Wednesday, 5 February 2014

Shooting

Once i had an open weekend, i was able to shoot for the short sharp shot, and did this using my Panasonic HDC-SD60 cam-corder. I started recording some of the clips that i could do by myself as some shots needed me in the shot and i couldn't be holding the camera and be in the full shot as well.

So i started shooting on the 1st of Feb on my own with the shots that could be shot with me recording them with the camcorder. And later shot on the 2nd on the Sunday with my sister of shots where i needed someone else holding the camera, because i was either in the shot or doing something in the shot.


In these two shots it starts off with a POV (Point of View shot) of the recording equipment to help make the equipment the focal point and to put people in my perspective. I then wanted a shot of my face looking at the down at the equipment. I did record some of the shots with me in it like the 2nd shot for example as it was easy to steadily hold the camera in a good position.


These next to shots are an extreme close up of my eye looking at the equipment to make the sequence more dynamic and interesting and giving more of an insight to my focus and where I'm actually looking which is the equipment. So the use of the shot helps to establish my thought process before setting up like ''what to set up first'' for example. The next shot is my hand grabbing the microphone stand, and i filmed this on a stool i had to when grabbing the mic stand the camera wouldn't be messy. The helped me to get a better shot of me grabbing the stand.


One of the shots after grabbing the mic was me going downstairs with it, and this shot had to be done with the help of my sister as i couldn't use a stool or anything to help get the right angle so i had to film this on the day after first shooting when she was free.

The shots afterwards i filmed by myself were me settling the mic stand on the floor as well as opening the legs of the stand. This was filmed by placing the camera on one of my stools so the camera movement would be still and not look messy or ugly, so i did occasionally film using a stool to place the camera on when i was recording by myself.

The shot of me placing the mic stand is the start process of actually setting up the in my living room and the shot including my legs helps to know i've entered the room and about to set up the stand. The next shot afterwards was also done by placing the camera on a stool to get a still movement of me opening one of the legs, again to me it look more professional and less messy.


Afterwards i filmed me opening up the other two legs from the mic stand and did this with other angles to make the shots look more interesting with the repetitive action and also more dynamic.


Afterwards i then was able to shoot me placing the mic on the floor and did it by placing the camera on a low angle on the floor to make it more obvious that the stand was placed on the ground. The next shot i was able to film was a closeup of the mic at the side. This shot comes after me going up the stairs so it makes this shot obvious that i'll be getting the mic and setting it up next.

The other shot was me then going upstairs to go int my room and get the next piece of equipment and was filmed by my sister as i waled upstairs.


After going upstairs the next shot is of the microphone which makes it obvious that its the next piece of equipment that i'm about to get and set up. The shot afterwards is me grabbing the mic.


The shots afterwards are me unscrewing the mic and taking apart the original stand and i do this by using a close up to make it more obvious what i' doing in the shot. The following shot afterwards is me placing the first screw on my drawer. 


Since there are two screws to unscrew i made the 2nd screw an extreme closeup to make the similar action more interesting and dynamic. The shot afterwards is placing the 2nd screw on the drawer, with a closer shot of the both laying on the drawer.


 After unscrewing the screw from the microphone i then take the mic itself from the rest of the mic and then i have a shot of me grabbing the mic cables and then going downstairs. In the stairs shot, instead of using a similar shot of my going downstairs from my previous ones i wanted to use different perspectives and this one i had the camera lay on the stair as my feet  show up and going downstairs.


The next two shots include me from a POV and placing the mic cables on the floor, followed up with a high angle shot of me placing the mic on the mic stand. The mic on the mic stand angle being helps to make it more unique and dynamic of a shot compared to some of the other shots.


The next shot includes a close up of screwing in the microphone and the use of a close up helps to establish more and make it obvious what i'm doing. The following shot afterwards is me unscrambling the mic cables with the use of my hands achieving this action.


The shot afterwards then includes a slight low angle shot of me placing the cable and connecting it in the microphone. Then going back upstairs with a close up shot of my feet going upstairs with the camera placed on the stairs.


Afterwards the shot follows up by me opening up the computer drawer where i store my laptop in with a closeup shot of my hand opening the drawer and getting closer to the shot making it more interesting and dynamic of a shot. Then the shot goes onto me gabbing the laptop out of the drawer with another POV shot.

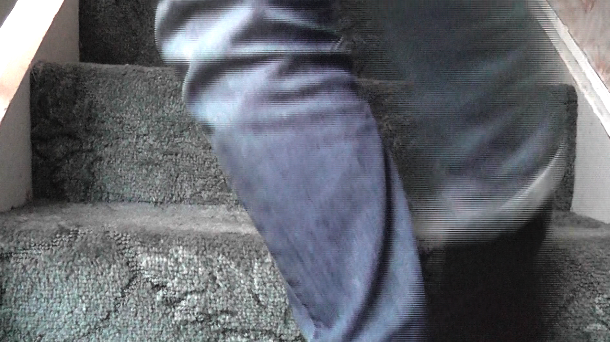


Finally i then grab the last bit of equipment which is the pop filter and then head my way downstairs. The shot of the stairs is a mid-closeup of my legs going down the final steps and making my way off camera. Again i was trying to make certain actions which were repetitive and used a variety of different shots and angles to make it more engaging and dynamic of a sequence.


The next couple of shots include me placing the laptop on the table and then opening it up.


Afterwards the shots include a closeup shot of me screwing in the pop filter on the mic stand, and the use of the closeup helps to make this more obvious. The shot afterwards is me flipping the pop filter upwards so it faces the mic in front of it and  did this by having the attachment of it to the stand turn upwards so its slightly obvious and works with the next shot.


The next shot is a closeup of the mic and the pop filter coming in the shot and moving in front of it which helped to flow well from the last shot. The action in the next shot is of me grabbing the mic cables.


This then leads to me plugging and connecting it to my laptop which needs to be done in order to record sound from the microphone so its very essential. Then shot afterwards is the 2nd shot of me grabbing the 2nd cable from the hauppauge, which is the cable to record the video game footage from the consoles. The shot has the camera placed on the floor so the cable and hauppauge are in the shots.


After having plugged in one cable into my laptop i wanted to make the following shot slightly different so i achieved this by using an extreme close up of the second plug going into my laptop. After having set up everything the next shot consists of looking at the clock to see what time it is and to also be a reference to what time my friends are going to get round my house for recording.


The final two shots are a mid shot of me looking at the time from the clock and then taking a breather after all that work of setting up the equipment. I did this with me rubbing my forehead n relief. The following shot is a extreme close up of one of my friends knocking at the door. Making it obvious that they have arrived and that i was just able to set up the equipment in time before they made it to my house. The final shot also creates a type of enigma towards the audience and is how it will end.

Overall shooting was a fun process and allowed me to record some great footage and what i wanted for this sequence, so i'm very pleased and now i have to edit the shots together within 20 seconds on final cut pro and emphasising sound through the actions 

After shooting the shots i can already tell that some shots on their own have great diegetic sounds and some sounds are needed for certain actions to be emphasised so this is what i will be working on whilst editing this whole sequence.


Monday, 3 February 2014

Diegetic and Non-Diegetic sound

Within this assignment we have to emphasise sound through sound effects, which can be either diegetic or non diegetic sound, meaning we can either use real sound effects from the sounds we film in our sequence, making them organic sounds or we could use fake sound effects to add dramatic effect. However we can turn up the sound from the organic sounds from the shots if we please which can still help to emphasise sound. Overall we can choose either way and after filming my sequence i'm choosing to most likely use a mixture of the two.

There were some sounds like screwing in things which didn't have much of a sound when filming it so i want to use non diegetic sounds for things like that which didn't get the sounds i want to use to emphasise sound. On the other hand some of the shots i did when plugging in cables and placing the cables on the floor along with the knock at the door sounded more natural but were really good sounds i wanted and are organic but can work to help emphasise sound.


Overall i'm most likely going to experiment with sound both with non-diegetic sound effects from software and use and turn up the volume on some of the more natural and organic sounds and hopefully all put together it will work really well and sound great as well as looking really good too.

Mise-en-scene (Setting/Props) & Camera type for Short Sharp Shock

With all of the development in this project with research and generating ideas as well as putting these ideas forth to the class in the form of the presentation i was now able to start filming for my idea.

Setting: Inside my House (Bedroom, Staircase in Hallway, Living Room)

My mise-en-scene for filming the setting is going to be set in my house, as its where me and my friends record our gameplay footage. The main shots will be my living room which is where we actually record as it contains the huge TV and my game consoles and living space to have friends sit freely and chill. The other shots will be in my hallway as well where i go up and down the stairs to go to my bedroom. My bedroom is another main part of the setting as it's where i have all my recording equipment in. So these three settings in my house will be where the main action happens.

And the activities in the film since its quick and is about preparing to record will contain be going back and forth from getting parts of my recording equipment, then going downstairs and setting it up then coming back upstairs and getting the next piece of equipment. So there's a lot of repetitive cycles in a sense.


Props:


Link:
http://g-ec2.images-amazon.com/images/G/02/uk-musical-instruments/product_content/blue/Yeti_Larger.jpg

There are a few props which will be used for this process of preparing recording equipment. Firstly my microphone which is a Blue Yeti Microphone and this is used for recording commentary audio and is what i use when recording with my friends to record our commentary whilst playing a game which we are recording. This prop will be used to take part of its original stand and then used to place and screw on to my better microphone stand.


Link:
http://c412668.r68.cf3.rackcdn.com/catalog/product/cache/1/image/9df78eab33525d08d6e5fb8d27136e95/e/s/essentials-boom-microphone-stand.jpg


Which brings me to my next prop which is the microphone stand and i usually use this for recording with my microphone as it helps to get the better audio from the mic and ends up sounding clearer as me and my friends when recording don't sit next to each other on one sofa we sit in different positions in the living room, so this microphone stand helps to capture all of our voices in better quality. So this prop in my sequence will be used to open up the legs of the stand and then placed on the floor which will lead into me placing the mic and the pop filter on it.


Link:
http://static.musiciansfriend.com/derivates/19/001/418/810/DV020_Jpg_Jumbo_621102.001_black.jpg

The other prop in my sequence is the pop filter. A pop filter is to reduce the about of fuzziness or popping or static that is in its environment and is used wit the mic. Placing the pop filter helps to give better quality to the mic audio which is a good thing and is what i use for recording with our audio from the mic. Now this prop will be used to screw in onto the mic stand and then to flip up in front of the mic as its how its assembled.


Link: 
http://www.kitguru.net/wp-content/uploads/2012/10/DSCF2285.jpg

The other props include the microphone cable which is used to be attached to the microphone and then attached to the laptop so the microphone is connected ad can be recorded fro my laptop. Another cable which is used is the happauge HD PVR cable. This box is basically what is connected to the TV and games consoles to allow it to record the game video and game audio and is what i use to record the gameplay. The cable from it is to link it to the laptop so it can record the footage from the software installed on my laptop.


Link:
http://upload.wikimedia.org/wikipedia/commons/9/90/Dell_Studio_1535.png

The final piece of props for the recording equipment is the laptop which i record the audio from the mic and record the gameplay from the consoles we play on. My laptop for this sequence will include me getting it from my desk draw and then placing it on the table and opening it up as well as connecting the mic cable and happauge cable into.


Camera type: Panasonic HDC-SD60


Link: http://media.panasonic.eu/images/HDC-SD60EB-K-Additional_WebImage__HiRes-Image--[2]((Europe))-1ZoomA1001001A11C18A04627B93308.jpg

With this project, since my I Phone is a 3G it doesn't record in HD quality so i had to go to my next option which is my cam-corder which is a Panasonic HD-SD60 and it records in HD which is what we are expected for our video quality for our 15-20 second sequence. This cam-coder is easy to use and record, and when i used this for recording it was simple and easy to use and helped me get the shots that i wanted.


Presentation and Feedback


Above is my presentation that i used for presenting my ideas to the class as well as some of the inspiration i got from one particular video and might consider using the technique of creating a rhythm from the emphasised sounds in my final idea, but haven't decided yet.

In my presentation i briefly talked about the assignment brief and what we basically had to do for this assignment, followed by showing one video that i was inspired by as this video used natural sounds in the video to give a type of rhythm and beat to the video and turned into more of a music video with the use of sounds and the way it was edited.

I talked about my brainstorms and ideas for actions i would use for my final idea of preparation for recording. I also explained what my final idea i based off, i.e. Let's Plays and just explaining this so people understood my idea for this project, and got a better grasp of what i was actually doing for my time based media. 

I then showed off my draft storyboards so people got more of an understanding of what the process would be like and potentially what type of shots i would use for this idea. I then concluded that my main idea was preparation for recording, and that i'd use a range of emphasising sounds and what shots i would most likely use as well as potentially exploring the whole rhythm sound effects idea, but making a note that i wan't sure i would go for this but definitely explore this idea and experiment with the sounds i use and interpret them into a rhythm. Also i stated that i may use an intro or outdo but haven't decided yet.

This basically what i talked about in my presentation and felt like it went quite well. I didn't really receive much critique from the class, and was praised for my great storyboards, but could've had each shot be its own storyboard. But i explained that they were draft storyboards and i was going to make each shot larger on paper. Overall i didn't really receive any type of critique, which i'm really pleased about.


My Idea (Preparation for Recording Equipment for Let's Play's)

After doing a lot of research into different types of video, like TV advertisements, film trailers and Youtube videos etc. Analysing the videos helped to look at the micro elements in a critical and analytic way, helping to give me inspiration of what types of shots i could use for my idea and how i could go about showing the process/journey of my idea.

When i started brainstorming i thought of a few ideas which related more to the journey side of what the brief was asking for, like ideas of journey to college, or a daily routine, or cleaning up the house or my bedroom. But then i came to think of a great idea which would work really well with this project where i'd feel confident in presenting 30 shots in the space of 15-20 seconds.

My idea is preparation for recording let's plays. Let's Play's are videos where people record gameplay footage of what game they are playing and have commentary over it, either live commentary or post commentary, where people then edit the videos together and upload them on Youtube. This is a hobby of mine that i really enjoy  and have been doing for over 2 years now and i record and do this Let's Play's with 3 other friends of mine, to make the recording footage more funnier, and entertaining, and we've enjoyed getting great feedback and viewers throughout the time we've been pursuing this hobby and i has only encouraged us to keep doing it.

So knowing a little bit about what Let's Play's are the preparation of recording process would include, getting equipment such as mic, mic stand, cables, laptop etc and then going downstairs and placing then in the living room and setting up the equipment. This includes placing the mic stand and screwing in pop filter and mic onto microphone stand as well as opening up laptop turning it on and plugging in the cables etc.

The the process would start with me looking at the equipment in my room and then grab one piece of equipment an go downstairs and set it up in living room, then going back upstairs and grabbing another piece of equipment and so on and then plugging in the cables to from mic into laptop and happauge recorder cable and plugging it into the laptop then it would end with me looking at the time and hearing  a knock at the door, (knowing that its my friends here to record)

So this basically the main concept idea i have and think its a great way to show my process of setting up the equipment for recording Let's Plays. I will most likely be using a range of shots and a lot of them will be close ups or mid close ups, as well as some POV shots and other types of shots, but i'll experiment with shots to see what looks best.

Also i'm considering in creating a beat or rhythm within the video rom the emphasis of sound effects from the going upstairs/downstairs, screwing in things, placing things down, plugging in things etc, but it'll be something i'll consider and potentially experiment with when editing it all together, but  i haven't made a final decision if i want to do this idea of creating a rhythm from the sound effects, but i guess we'll see.

Sunday, 2 February 2014

Analysing YouTube Clips (Gardyn | Pogo)


http://www.youtube.com/watch?v=cBN-CAhOYQ0


One example of video i wanted to analyse was this amazing video which is to do with gardening, but the gardening part of this video is the main factor or why  chose to analyse its because of the way its been edited and portrayed as. This is a video from YouTube made by a guy named Nick Bertke or better known as his YouTube username, Pogo.

Pogo is a music producer and a remix artist as well as a film maker as well, and all of these aspects are portrayed in this video through the of sound and video. In a lot of Pogo's videos he either films or uses film clips and edits it in a way to create a rhythm within different sorts of beats through the use of natural sounds or dialogue. He also uses a tune which adds to the beat and flow of the sounds which ties it all in making it feel like very unique and different sorts of remixes or mash ups.

This video is great inspiration, as he uses sounds from the garden to create a beat as well as using his mother, talking to give a type of flow and beat to the video. 


At the beginning of the video it starts with simple sounds he makes from outside, like rustling leaves, knocking the shed door etc to create a consistent and repetitive beat to the video, all through the use of sounds. and the way he'll do this is go from clip to clip with the sounds and use the audio from the sounds which aren't on screen to add to the beat and flow to the sounds creating a great rhythm and makes it sound more and more like music but different from what you'd assume.

The use of shots help to give people the idea of what sounds he's making and how he's making those sounds, then tends to go back and forth and reuse some footage within the music from the sounds in the background to give a repetitive feel and cycle of the sounds he's emphasising from natural objects and wild life.


Pogo also portrays his mum with a selection of clips and her gardening, which give the impression he looks up to her as well as loving gardening which is something she might be proud of and something Pogo might have wanted to show as well as how natural environments and objects can make such amazing sounds and rhythm in a way people didn't realise. The shots of his mum occasionally talking from her voice he also portrays it in a way of beauty and natural sound, and does it by edited the video of her talking, along with her speech into sounds but does it in a way which makes it sound relaxing and serene and the video and mise-en-scene of the environment of the garden help to convey peace and relaxation and natural beauty and i think Pogo has copulated it all together in such an amazing and inspiring way.


Also this video is a lot of inspiration for me with the current project of the Time Based Media Project. Because we have to exaggerate sound and because with my ideas i might be using repetitive shots from going back and forward it parts, so with the sound i will be emphasising it i could give a sort of flow or rhythm to my video with these sounds which will help make my video more dynamic and might be a lot more interesting and successful. Despite this, this is only an idea and this video helps to give me inspiration to potentially try something with sound and rhythm fro ma selection of repetitive sounds which are emphaised a lot in this very past paced video, so i will defiantly consider this option and maybe as I'm editing the video I'll try it and see what outcomes i receive.


A Single Man (Drowning Sequence)

http://www.youtube.com/watch?v=XozQfSJKp0o

Sequence: 0:00 - 1:44


The next film i wanted to look into and Analyse was a film directed by Tom Ford in 2005 and is a drama genre based film and is about a male who has lost his boyfriend after finding out he died whilst visiting his family and now George who lost his boyfriend is alone and its about his life and the feelings he has after being alone, which include depression, suicidal thoughts etc and the film is a process of him not wanting to cope with the stress and upsetting pain he feels for his loved one and later has a turning point to stay a live which ironically leads him to death as a result of not taking his medication.

This film is very powerful and close to my heart and i feel extremely strong and close towards the character when i watch this film as you can see his pain and it makes your heart ache and it is so beautifully made and well directed as a film. One scene i wanted to focus on is the very first scene in the film, as it has strong connotations towards how the character George feels at the time and signifies the pain and how he feels with losing his partner.

The scene is the introductory credits with the opening scene of George is a dreamlike world, as if he is underwater and naked as well as showing him in a way which makes it look like he's drowning/sinking.
When we think of the word 'sink' we would refer it to something getting lower and lower. This idea that he's sinking is a metaphor for his emotions and life and also signifies his depression.

Let's look at the micro elements and apply them to this sequence and analyse this scene a little bit more.


Cinematography


The cinematography uses a lot of shots but does it in a way that you can't really see the full picture of him sinking. The shots mainly have parts or sides of his body sinking lower, so there is a range of different shots but is harder to tell with the way its edited as it looks quite blurry which creates enigma already to the audience, wondering 'what's going on?' 'who is this?' etc and these questions is what the film wants people to think, and these type of the films are the films you need to watch twice to notice things like this so it becomes more clear watching the second time round after knowing all about the narrative and the main character.

Mise en scene

The setting is underwater, and we'd assume it would be something like the ocean. The use the underwater is it creates this empty feel to George and this sense of isolation and depression as he's sinking. Him being naked is done to signify his vulnerability and is purity, sinking.


Colour


Colour is very important in this scene, when we think of blue we'd usually associate it with depression, cold or sad and this scene helps to emphasise the sad and emptiness by the use of the colour from the ocean as well as the actual setting on it being underwater. The colour has strong connotations towards George and his mood, and feelings by this sequence we can tell he's upset, alone, depressed, isolated, and afraid of trying to live on and find someone to get him through his tough time.

Because the colour blue is very dark it also represents and emphasises his depression and loneliness and isolation which makes the audience realise that this scene is about sad and upsetting emotions, as we usually relate blue to sadness and black to darkness and it seems that these two colours are mixed together in may senses.

Sound

The sound in this sequence is both a soundtrack and a sound effects which are used. The soundtrack feels like it has strong and saddened connotations to it, as its quite powerful in a upsetting but calming sense, as if George is at peace and ready to not be alive or around to deal with the pain he feels. The soundtrack adds a very majestic but sad feeling and atmosphere to the scene towards the audience and also the use of shots creates confusion and questioning of what is actually happening but slowly puzzling it together with the shots of George underwater and slowly sinking. All of these techniques, especially the soundtrack help to add to this sad atmosphere of isolation and depression.

The other sounds we hear are not only the sound from the water, which helps to add to the setting of being underwater, but the sound of heartbeats. This convey's his life and it beating slowly, which suggests time is moving slowly, and he is in agony and feels pain and as if he wants to just give up on life and die. The sound of his heartbeat is used throughout the film to emphasise him still being alive, with him ironically not wanting to be alive and later in the film multiple times wanting to commit suicide because of his life with the one he loves and the pain and agony in his heart he feels without his boyfriend.

Pacing

The pacing of this sequence is quite slow with each shot being about 4-5 seconds long. Based off this we can tell that the scene isn't suppose to be dramatic in a fast paced way, or action packed with a bunch of shots per second. The pacing is slow, and is done to add to the atmosphere and also make the person think, like the setting, who this is, why are they there, what's going on etc so people can try to unfold what is going on. But judging by the slow shots we and shot types it gives this dreamlike feeling of isolation and depression, by combining no one else in these shots besides George and the colour of the setting.